
How to… Make Flat Fell Seams
What are Flat Fell Seams?
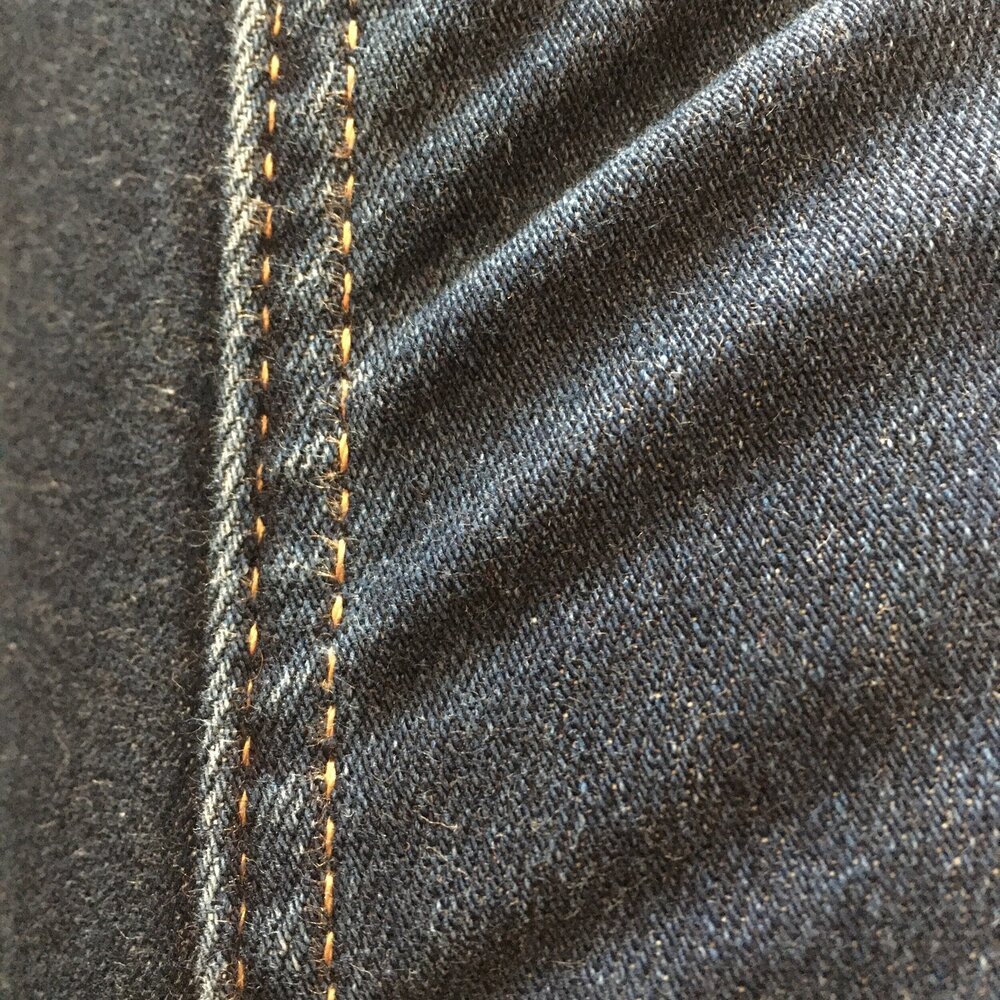
Flat Fell seams are created by stitching a seam on the outside of the fabric, trimming one side of this and folding the un-trimmed seam allowance over the trimmed to encase it. This is then finished with a second row of topstitching.
This creates a very strong seam and is used in high-end outerwear and workwear.
This technique was originally used in jeans making. Jeans were first created as essential workwear worn by factory workers, miners, farmers, and cattlemen throughout the North American West. Find out more about the manufacture of jeans.
How to make a flat fell seam:
Cut your fabric with the regular 1.5 cm (3/4 inch) seam allowance or up to a 2.5cm seam allowance for a more substantial seam finish.
Pin the pieces with the WRONG sides together.

3. Sew a straight stitch 1.5 cm (3/4 inch) from the raw edge.

4. Cut one of the seam allowances down to 1/3 of its original length.

5. Press the seam open.

6. Fold the longer seam allowance around the shorter seam allowance. Press and Pin it in place.
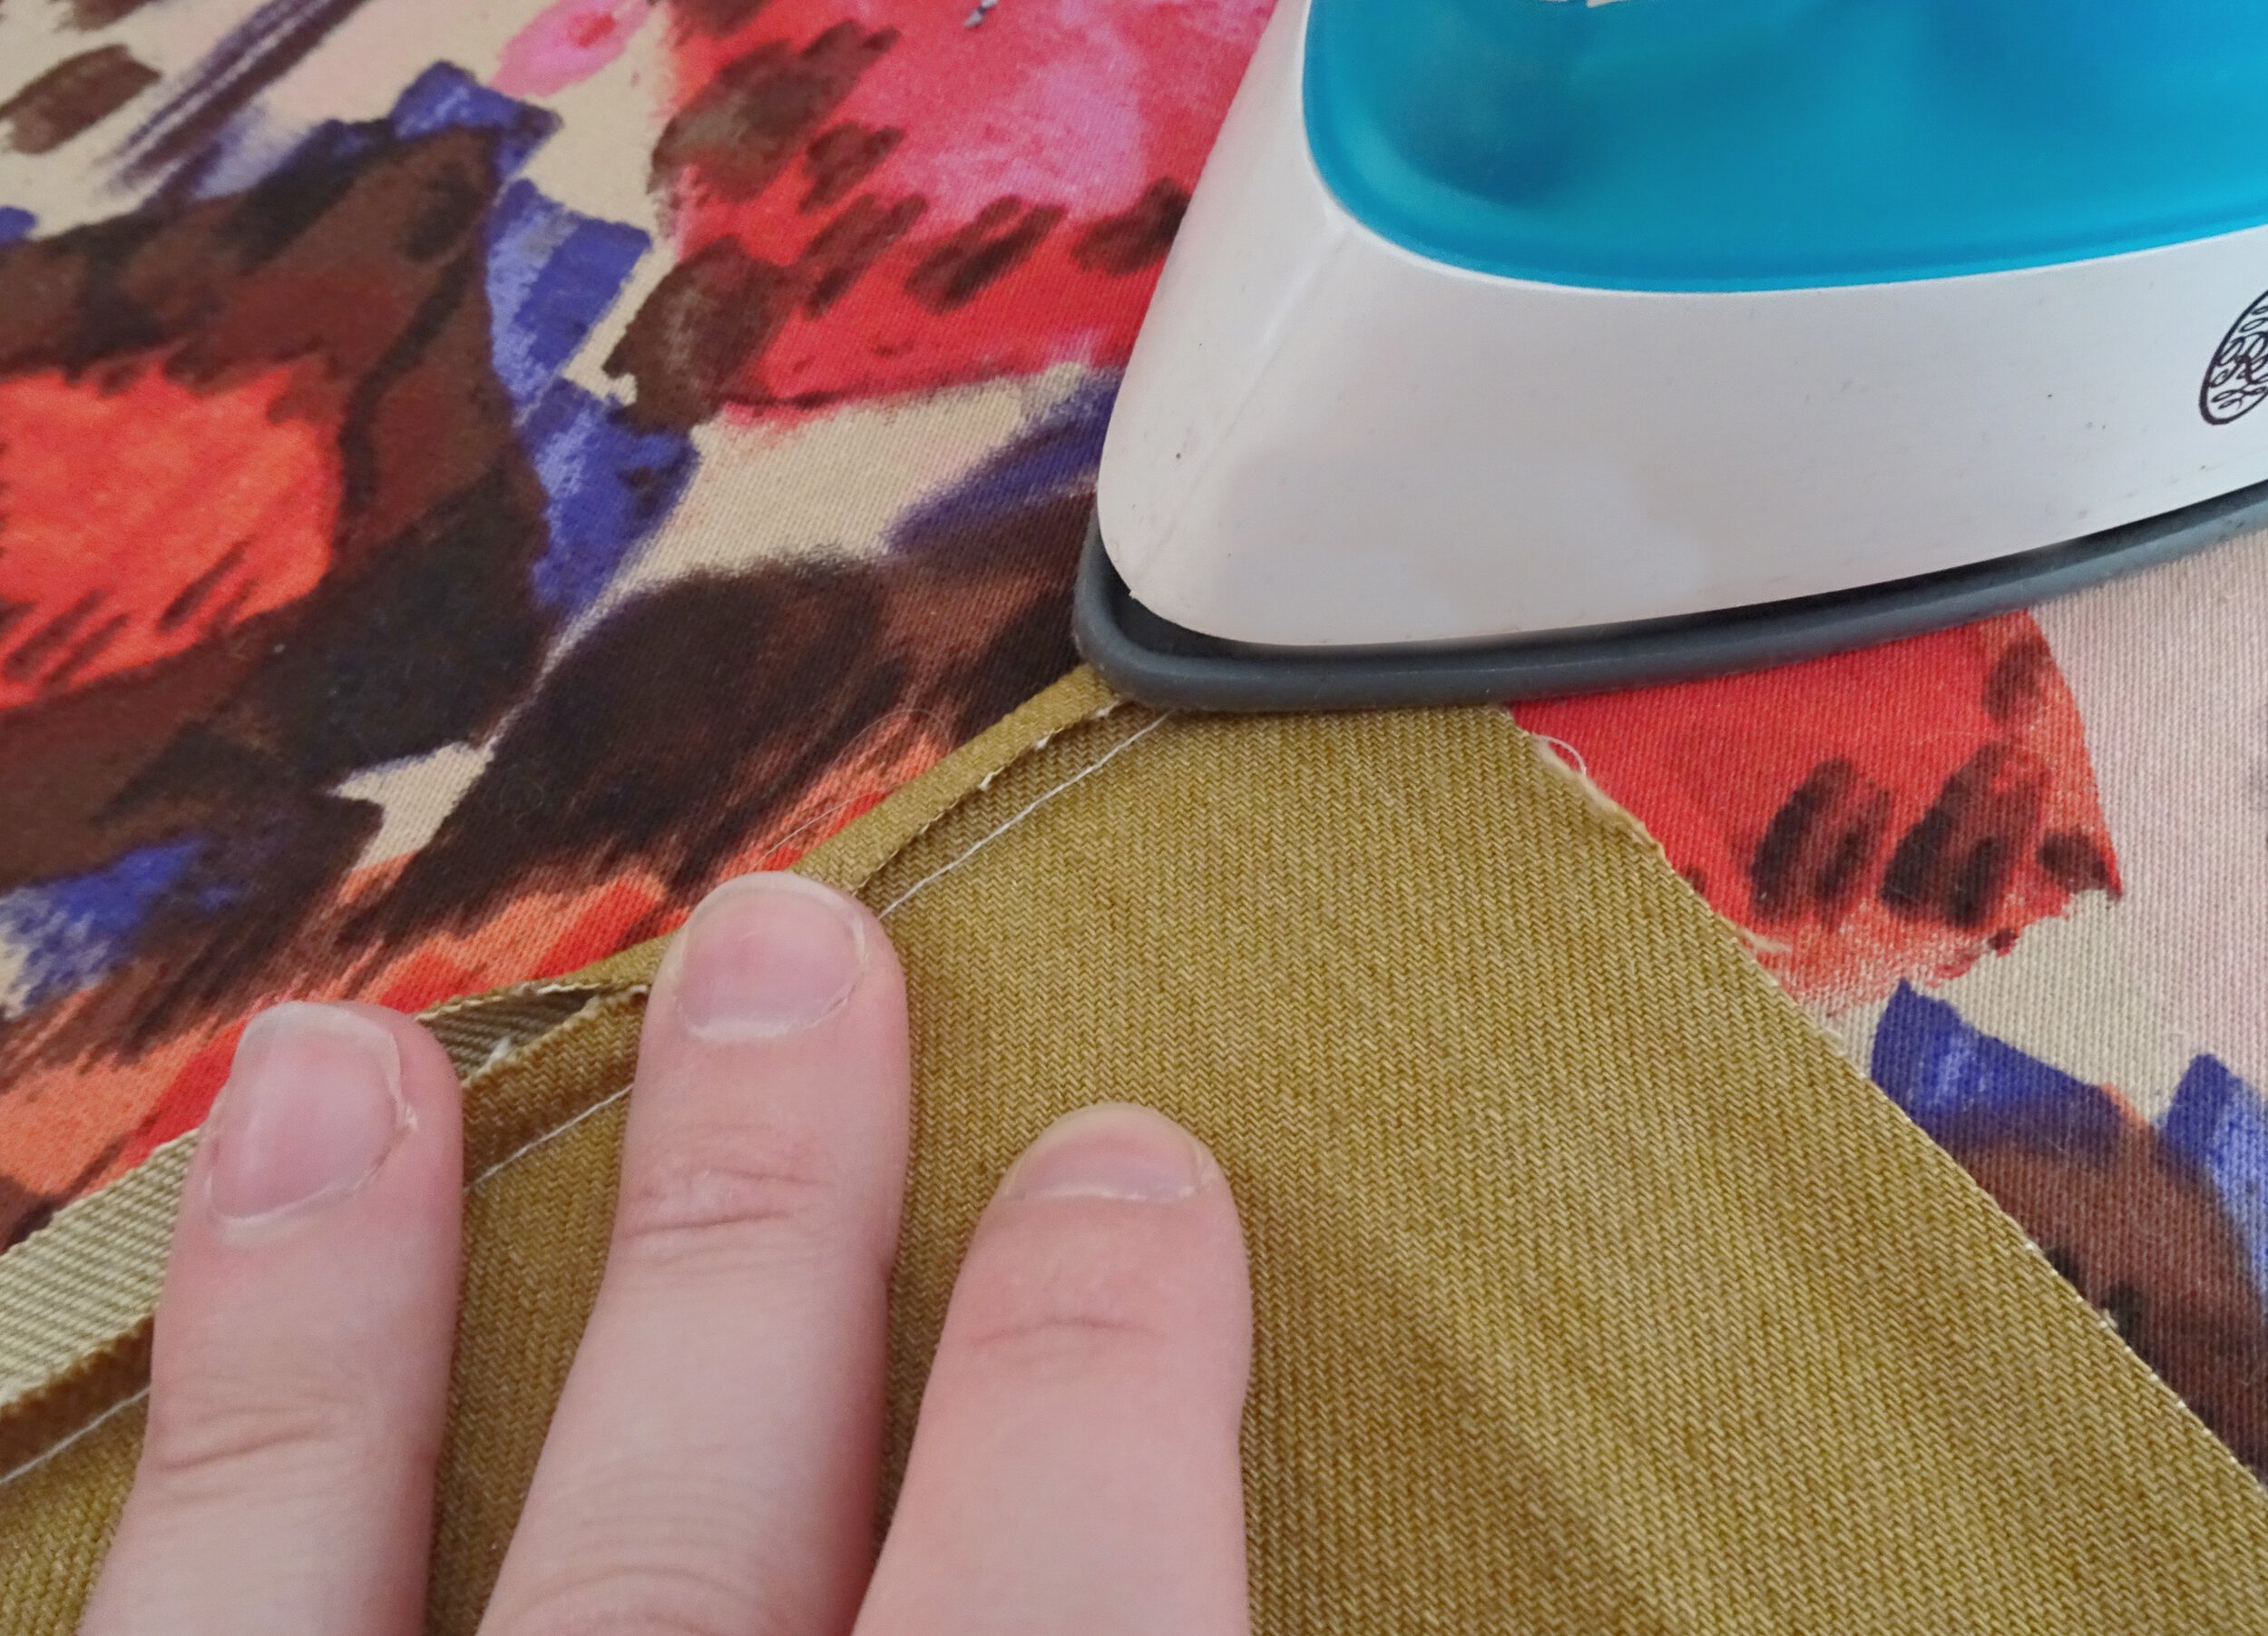
Tip: When pinning thick seams in placed before sewing them I like to tether them down by placing pins over the top of them rather that through them.
This quick video shows you how:
7. Sew a second line of stitching close to the fold.

This technique can be used on any fabric but works particularly well on heavier rigid fabrics like denim, canvas, twill and linen.
Speedy sewist tip…
A mock flat fell seam finish can be used as an alternative.
To create this finish simply trim the seam allowance to 1cm, overlock and then twin needle topstitch. The mock flat fell technique is used on most high street jeans so adding a full flat fell finish to your garments will set them apart and add a truly handmade finish!
Flat fell seams can be used in the construction of our Button-up Skirt Pattern